Showing posts with label DIY. Show all posts

Friday, August 26, 2011

When One Door Closes...

Take it off its hinges and make it into a wall tree/mud bench!!

Do you remember when I went to Habitat for Humanity and got a few goodies  and one of those goodies was a door?
(this door)

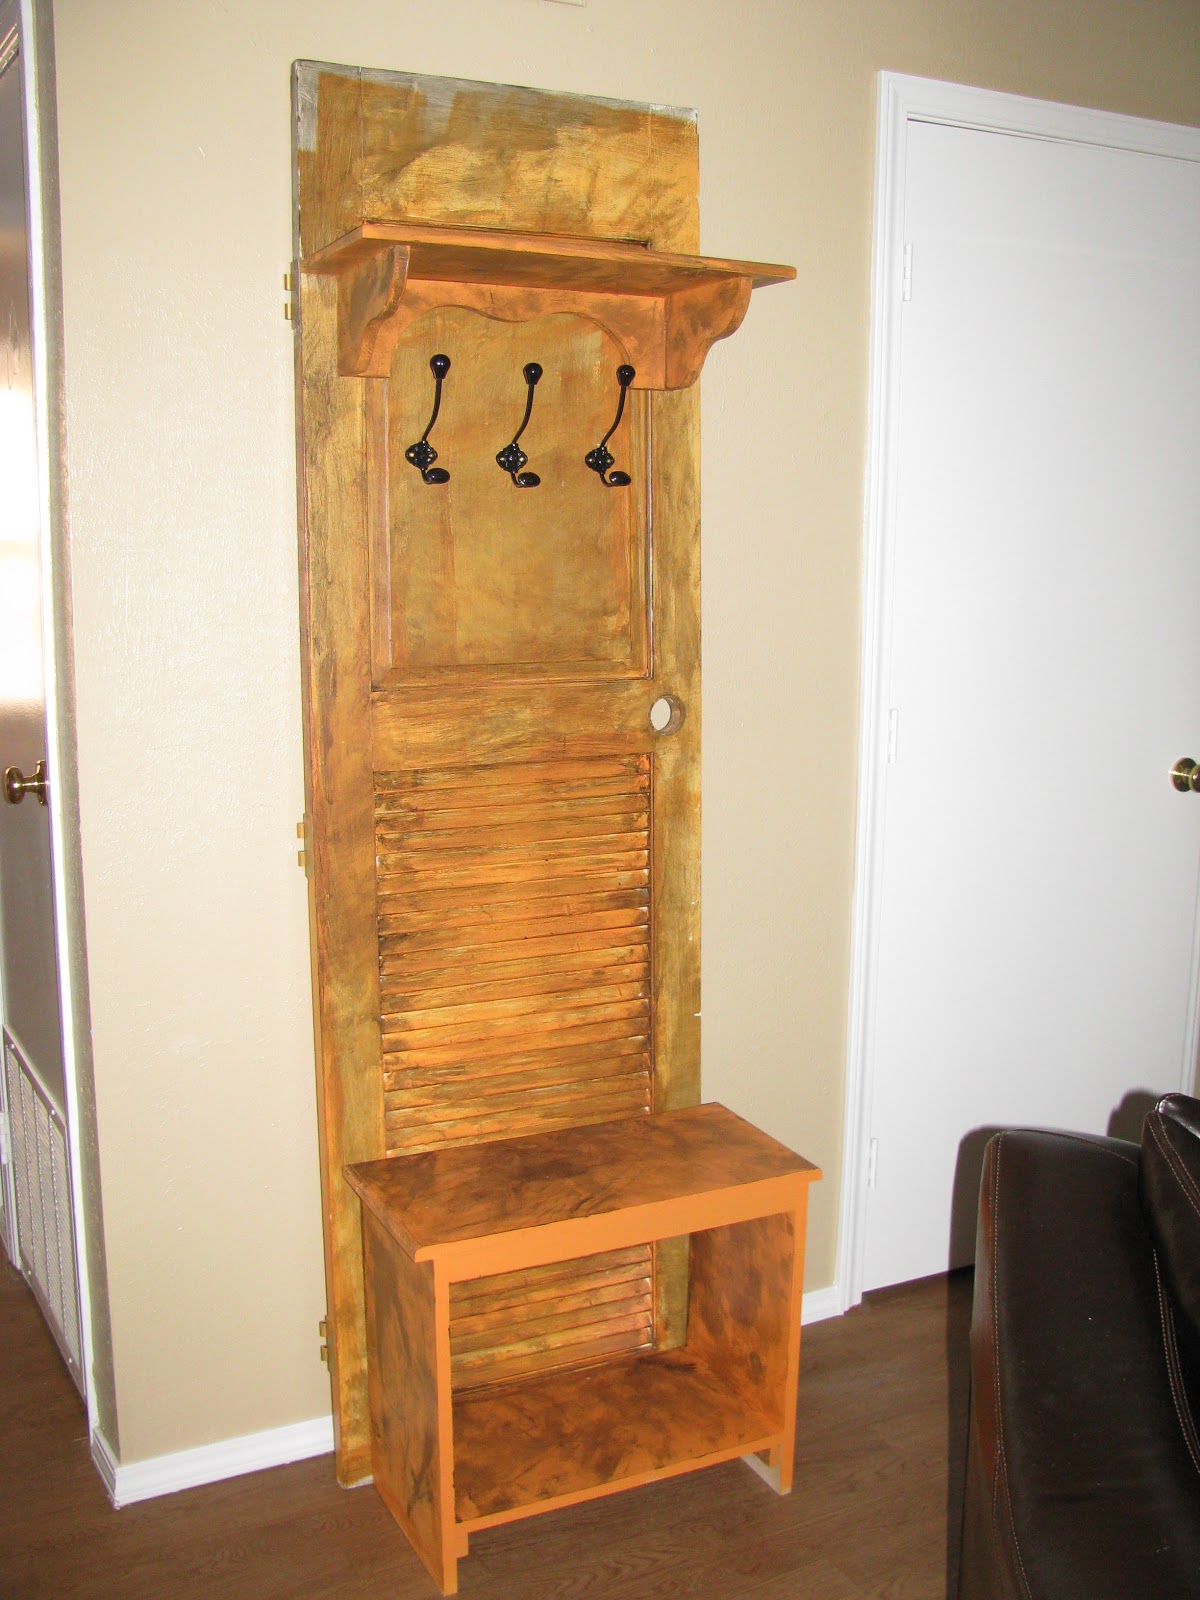
Well I turned that door into this...

You can barley recognize that its the same door huh?!? I have to admit I am pretty proud of this masterpiece but I could not have done it with out my mom and grandpa!

The general idea was my moms and my grandpa helped me make the shelf and bench.

What I used to make this:
Door - Habitat for Humanity $4
Hooks - Hobby Lobby $3
Orange paint - Lowes $13 for a quart (I also used this paint for a few other projects so my paint want going to waste)
Glaze - Lowes $8 
Bench and Shelf - Handmade by my Grandpa

The steps to make this are pretty simple and it didn't take long to make at all!

First I simply cleaned it up the door with a damp wash cloth and any dirt off. Since my Grandpa made me the bench and shelf so I didn't have to clean those (sorry I don't have any step on how to make it or anything) 

I then painted them all orange (you could use whatever color you want) and let it dry and then added the glaze and randomly painted/rubbed it on. 

The next day when all the pieces were dry I screwed on the hooks and nailed the shelf on to the top portion of the door. I left the bench separate so that I could move it if needed for extra seating in my little apartment. 

TADA!!

Thats all you have to do to make one of your own! Pretty cool right?!

I love it! It make a great statement in my apartment and fits perfectly in my entryway! 

Also I am so happy to say I am linking up with The Shine Project for the first time ever today!! She has a link up party goin on for any home re-do makeovers! So you should definitely go and check out everyones amazing projects or join in!!

On that note you pretty pumpkins I hope you have a fantastic weekend!!

I cant wait to share my weekend with you on Monday!

x's and o's
Kaitlin Jean

Tuesday, August 2, 2011

Picture frame, Picture frame on the wall...

who are the best, sweetest, most awesome people ever?!
Actually never mind! 
I already know that answer...
All of you are!! 

Before I officially begin this post I know there are three things on everyone's mind to begin with today!

1. Ashley picked JP!!
(I might be a Bachelorette/Bachelor fanatic! I just can't help myself!)
I liked JP from the beginning! So I was so happy when it was him in the end!

2. Poor Ben! The guy was just such a sweetie! 
(next Bachelor?! I sure hope so!)
3. The Bachelor pad is gonna be c-r-a-z-y! 
I mean what a major drama preview! I am sure we all know we will be watching every episode!
(No need to be ashamed! Its just pure entertainment!)
Now that I have addressed the big news story of the week, I have an awesome super easy DIY craft for you!
...
How many of you have some of those old picture frames that you just don't really know what to do with?
*raise your hand if that's you*
(its okay no one will walk by and see you staring at the computer with your hand in the air and think your weird, then post you as number one  for awkward in their awkward and awesome post!)
(okay they might but who cares your still awesome!)

How many of you always see those beautiful neato picture frames thrifting and wondered what you could do with them?
*raise you hand*
(everything said above still applies to you)

Well I have the easiest solution for all of those frames!

As you all know I am about to move into my first apartment (12 days from now to be exact!) and I have a college student budget to make it home sweet home!

I will admit right up front I know this isn't super creative or even original but it is a wonderful DIY craft that can fill any empty wall 

I found some old picture fames in my mothers hall closet and found out she didn't want them. They then instantly became mine!
* Insert evil villian laugh...mwahh hahah* 

I then thought these would be perfect for my apartment!
I proceeded to find two more frames at a garage sale and two more for sale at hobby lobby!

Here they 
(My mom also gave me an old mirror and so I decided to include it in with this project)
I love when people have walls of vintage frames but leaving these vintage was not going to work in my apartment I have more of a high glam/shabby chic style going on. 
So I decided to turn all of those random frames into these beauties!
Beautimus aren't they?!
It easy as pie to transform them! 
(I know this is a horrible picture and I am so sorry! My camera ran out of juice and so had to use my IPhone to take this picture this morning. When I get more batteries I promise I take a much better picture and post it for you!)

All you need is to make this magic happen is some high gloss spray paint!
You can find this at just about any home supplies store, craft store, or even your supermarket!
I got my paint from Lowe's and Wal-Mart

I picked orange (best color eva!), Navy, Gray, and Black as my paint colors.
You can choose which ever color(s) your heart desires!

Once you have your paint and frames all you have to do is 
1. find a good place where you wont get paint on anything precious (I luckily have an old empty coldesac in my neighborhood that I used) 

and
2. Spray paint those babies! 
Make sure you spray from every angle to get every nook and cranny in your frame! 
I sprayed a good base layer on my frames and then let them dry for a bit. Then proceeded to spray them really good once more.

I told you this was easy didn't I!?

This is all you have to do to get some high gloss frames ready for that bare and blah wall!

I might end up adding some wire to a few of these frames to make them like this...
If I do I will definitely let you know!

(And Again I know my after pictures stink and I promise I will take better pictures and post them asap!)

One of the best parts about this little project is that I have spray paint left over! woot woot!

Do you have any ideas of what I can do with all of it?!

tell me! tell me! tell me!
please! :)

xo,
Kaitlin Jean

Thursday, July 21, 2011

DIY: T-Shirt Bracelet

Remember the adorable T-Shirt Bracelet I Posted?! AND how I told you to go grab a pair of scissors and that old T-shirt in your  closet under a big bundle of who knows what!? If you don't it's right here! 

 I took my own advise yesterday and let me tell ya I am sure glad I did! I am now the maker and owner of a super cute in style bracelet for FREE! woop woop! You can have one too (blogging buddie friendship bracelets? I think so!) It is easy peasy lemon squeezy! 

I found this link through Pinterest which lead me to a tutorial on how to make Jersey T-Shirt Necklaces (okay I lied about the bracelets actually being a necklace but I didn't really know that until I looked it up) For me the necklace just isn't my style (big necklaces just are not a flattering look for me) so I decided to make my version a bracelet (like i originally thought it was anyway). Ooh and Guess what?! I am gonna tell you how I did it step by step with pictures! *football stadium crowd roar*


T-Shirt Bracelet
What Ya Need: An old T-shirt, scissors, classic sewing thread, and a needle


Step One: Fold shirt in half and cut off the bottom rim. Then cut three strips about 1 1/2 - 2 inches wide starting from the bottom of the shirt. 


Step Two: Unfold your three strips and cut the ends. (where the side semi is) This way you will now have six separate strips. 


Step Three: Stretch each strip out a few times to where it naturally starts to curl. 


Step Four: Divided your strips into two groups of three

(I have three groups in my picture but you ONLY need two. If you wish for a thicker bracelet then you can add a third)

Step Five: Sew together the top of the strips of the first group. This way you don't have to tie a knot and worry about them coming undone.


Step Six: find something secure to hold the sewn end of your first group of strips. (I just used my teeth but im sure safety pinning it to something with work just great too!

Step Seven: Braid! Braid the three strips together. Try to keep the braid tight and flowing flat. I would stop occasionally and measure what I had braided around my wrist that way I knew it would fit just right! 
REMEMBER you will be doubling/twisting your braid to where it looks like two bracelets in one. You don't want it to be two short and you not be able to fit your bracelet over your hand. (I might know this from experience...haha)

Step Eight: once you are done braiding your strips and have it at the right length sew both ends together. You will then have a braided "ring" 


REPEAT steps five through eight with your second group of T-Shirt strips


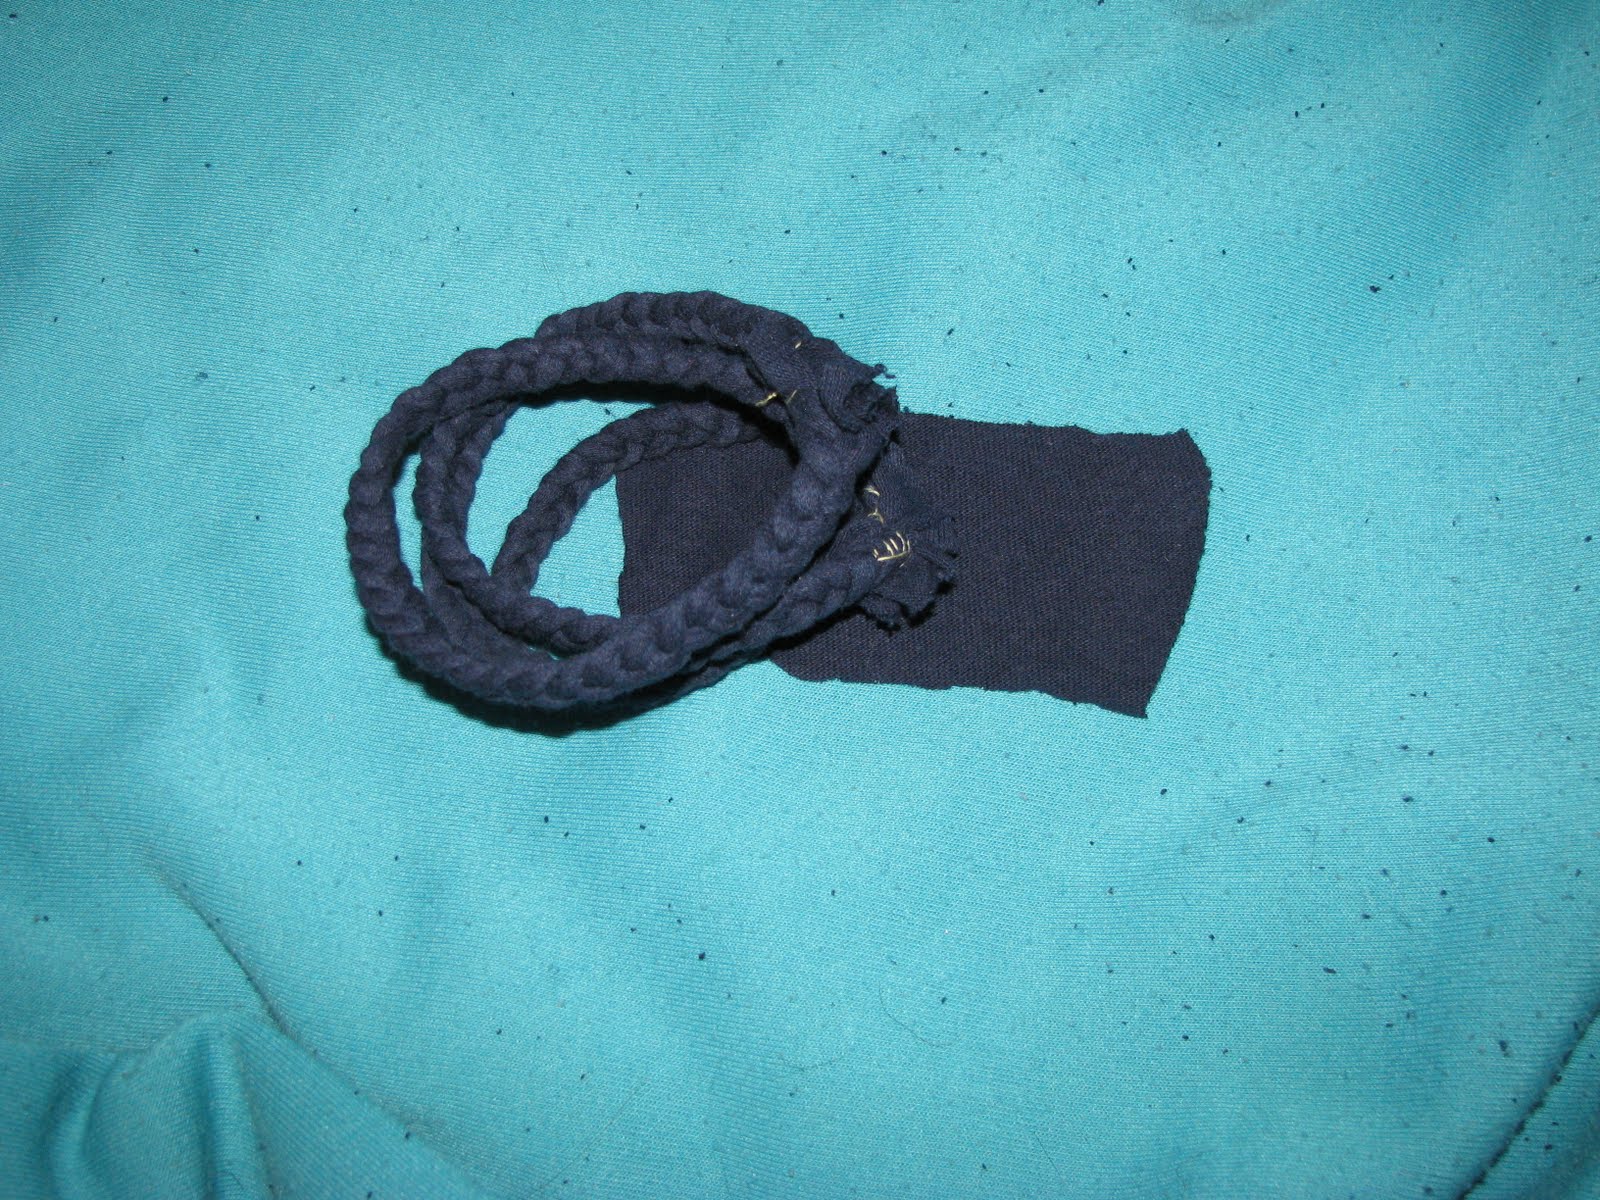
Step Nine: twist each ring in half and set aside. Then cut a small rectangle, from any part of your remaining T-shirt, that is wide enough to hide your sewn ends.


Step Ten: stack your two braided rings on top of each other and place half way on to the rectangle. Fold the rectangle over the tied ends of the rings.


Step Eleven: sew the rectangle together as close as you can to the bracelet


Step Twelve: trip the extra off of your rectangle and turn the sewn end toward the inside of bracelet.


TADA!!


There you have it! Don't you just love it?! 

Now go tell everyone to come on over here so they can learn how to make their own! 
(If you make your own don't forget to tell me and send me a picture!)
 
Hope you enjoy amigos!
Kaitlin Jean
Related Posts Plugin for WordPress, Blogger...